Part3-4 데이터의 학습에 대한 이해
데이터가 어떻게 묶여서 들어가는지에 대해서 설명
 #1개 이미지 확인
gfile = tf.io.read_file(path)
image = tf.io.decode_image(gfile, dtype = tf.float32)
image.shape
>>> TensorShape([32, 32, 3])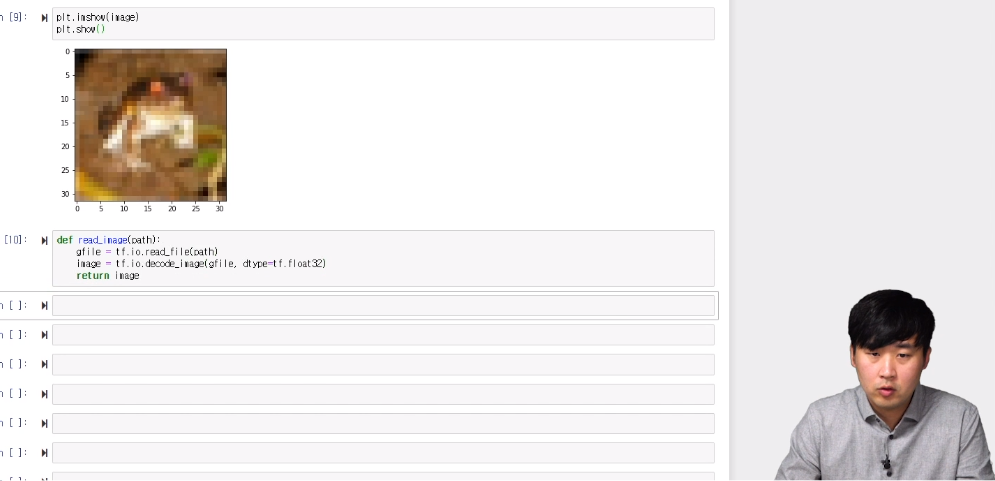
사진을 쌓아서 그래도 모델이 집어넣는다고 생각하면 됨
1step마다 배치사이즈 크기만큼을 모델에 넣어줌
batch_images =[]
for path in data_path[:8]:
    image = read_image(path)
    image = cv2.resize(image, (32,32)) #리사이즈 하는 것이 확실함
    batch_images.append(image)
len(batch_images)
>>> 8
batch_size
batch_size, height, width, channel의 형태로 구성되어 있음
batch는 여러개의 이미지가 겹쳐 있다고 생각
def make_batch(batch_paths):
    batch_images =[]

    for path in batch_paths:
        image = read_image(path)
        batch_images.append(image)

    return tf.convert_to_tensor(batch_images)
 #각 배치에서 처음 사진만
batch_size = 16
for step in range(4):
    batch_images = make_batch(data_path[step * batch_size : (step+1)* batch_size])
    plt.imshow(batch_images[0])
    plt.show()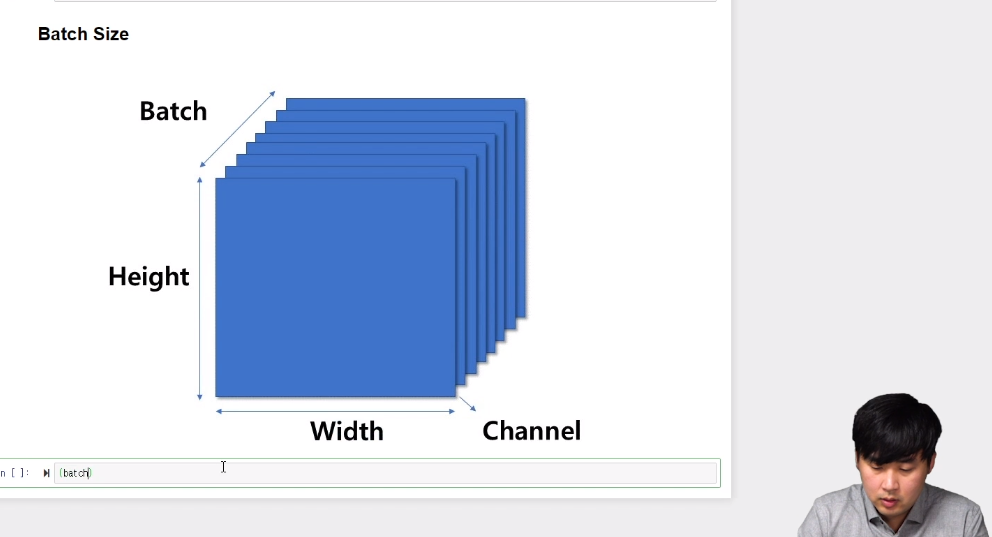
Part3-5 fit_generator
data load
#glob와 같은 역할을 함. tensor 타입으로 불러옴
tf.io.matching_files('dataset/mnist_png/training/0/*.png')
load image
gfile = tf.io.read_file(path)
image = tf.io.decode_image(gfile) #numpy로 변환과정
image.shape
>>> TensorShape([28, 28, 1])
set data generator
data generator를 하면서 데이터에 변환을 줘서 모델에 적용
고양이사진을 변형해서 이미지 학습시키 위함
from tensorflow.keras.preprocessing.image import ImageDataGenerator
datagen = ImageDataGenerator(
    rotation_range=20, #회전
    width_shift_range=0.2, #좌우이동
    height_shift_range=0.2, #상하 이동
    horizontal_flip=True #뒤집기
)
inputs = image[tf.newaxis, ...] #차원을 하나 늘려줌
inputs.shape
>>> (1, 28, 28, 1)
 #비교
plt.subplot(121)
plt.imshow(np.squeeze(inputs),'gray')
plt.subplot(122)
plt.imshow(np.squeeze(image),'gray')
transformation
변환시키는거에 중점을 두고 설명
datagent = ImageDataGenerator(
#     width_shift_range=0.3, #간격만큼 랜덤하게 움직임
    zoom_range=0.3, #이미지 크기조절
    preprocessing_function= tf.image.resize() #커스텀으로 지정가능

)

outputs = next(iter(datagen.flow(inputs)))
plt.subplot(121)
plt.title('origin')
plt.imshow(np.squeeze(inputs),'gray')
plt.subplot(122)
plt.title('transform')
plt.imshow(np.squeeze(outputs),'gray')
rescale 주의사항
- agumentation은 train에서만 사용
- rescale은 train, test 둘다 해야함
train_datagen = ImageDataGenerator(
  zoom_range=0.7,
  rescale=1./255
)
test_datagen = ImageDataGenerator(
  rescale=1./255
)
'책&강의 학습 > 올인원 패키지 :딥러닝&인공지능' 카테고리의 다른 글
| [패스트캠퍼스 수강 후기] 인공지능강의 100% 환급 챌린지 12회차 미션 (0) | 2020.07.10 |
|---|---|
| [패스트캠퍼스 수강 후기] 인공지능강의 100% 환급 챌린지 11회차 미션 (0) | 2020.07.09 |
| [패스트캠퍼스 수강 후기] 인공지능강의 100% 환급 챌린지 9회차 미션 (0) | 2020.07.07 |
| [패스트캠퍼스 수강 후기] 인공지능강의 100% 환급 챌린지 8회차 미션 (0) | 2020.07.06 |
| [패스트캠퍼스 수강 후기] 인공지능강의 100% 환급 챌린지 7회차 미션 (0) | 2020.07.05 |


댓글